Heat Press Instruction Manual: A Comprehensive Guide
This comprehensive guide will help you master your heat press. It covers setup, temperature, time, pressure settings, material compatibility, and troubleshooting. Whether you’re a beginner or experienced, this manual ensures successful heat transfer projects.
Understanding Your Heat Press
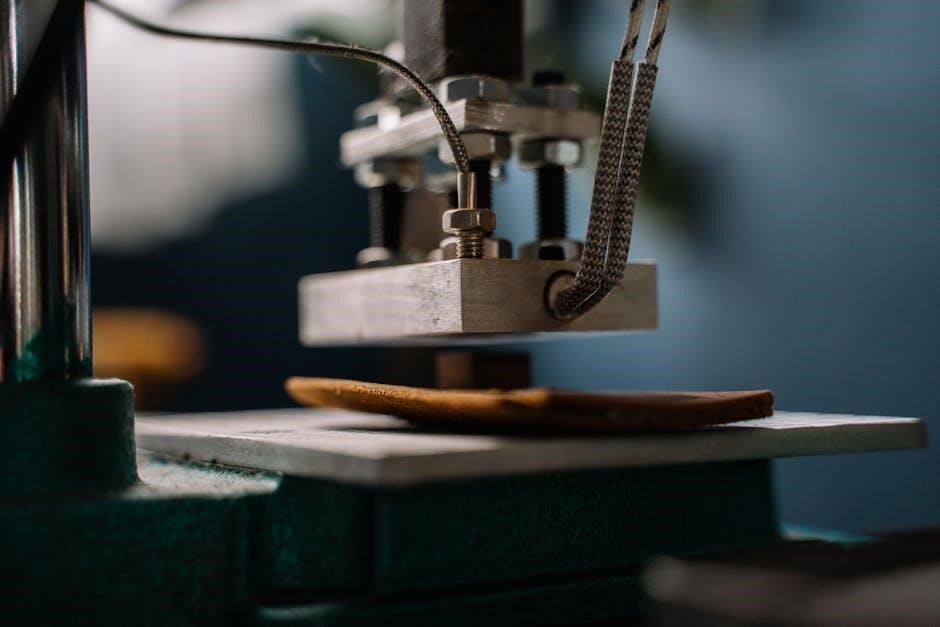
Before diving into projects, understanding your heat press is crucial. Different models may vary, but the core function remains the same: applying heat and pressure for transfers. Familiarize yourself with its components, such as the heating platen, pressure adjustment knob, and timer. Refer to the manufacturer’s instructions, as these can feel a bit basic.
Note that some heat presses don’t allow pressure adjustments. Knowing your machine’s capabilities is vital for achieving optimal results. Remember that all heat presses function very similarly. Even if you have a different brand, you should be able to start on the right foot after reading this.
Initial Setup and Preparation
Proper setup is key to preventing issues. This section covers unboxing, inspection, and component identification. Taking these initial steps ensures smooth operation and optimal performance of your heat press.
Unboxing and Inspection
Upon receiving your heat press, carefully unbox it. Check for any visible damage from shipping. Verify all components are present, comparing them to the included parts list. Ensure the power cord is intact and undamaged. Examine the heating platen for scratches or dents. Test the pressure adjustment knob. Make sure it turns smoothly without disconnecting; If any issues are found, contact the supplier immediately. This thorough inspection prevents future problems and ensures safe operation. Reading instructions for your heat transfer vinyl is important. Correctly identify the fabric for customizing to avoid issues.
Identifying Components and Features
Familiarize yourself with the heat press components. Locate the heating platen, the surface that applies heat. Identify the pressure adjustment knob, used to control pressure. Find the timer and temperature controls, essential for accurate settings. Note the power switch and any safety features. Some models have digital displays for precise control. Others might include attachments for different items. Knowing these components ensures proper operation. Remember that all heat presses are different, but they function very similarly. Even if you have a different brand, you should be able to start on the right foot using this manual.
Setting Temperature, Time, and Pressure
Accurate temperature, time, and pressure are crucial for successful heat transfers. Adjust these settings based on the material and transfer type. Always consult the manufacturer’s instructions for specific recommendations.
Adjusting Temperature Settings
Setting the correct temperature is critical for optimal heat transfer results. First, consult the instructions provided with your heat transfer vinyl or sublimation paper. These instructions will specify the recommended temperature range for the material you are using. Most heat presses have a digital control panel or a thermostat knob to adjust the temperature. To increase the temperature, press the plus button or turn the knob clockwise. To decrease the temperature, press the minus button or turn the knob counterclockwise.
If the heat press was off or cold, it will take up to 15 minutes to reach your target temperature. Wait until the heat press reaches the set temperature before starting the pressing process. A light will flash on to indicate the heat press is heating up.
Setting the Timer
Accurate timing is essential for successful heat transfer applications. Refer to the specific instructions accompanying your heat transfer vinyl or sublimation paper to determine the recommended pressing time. Most heat presses feature a digital timer or a manual timer dial. Use the plus and minus buttons to adjust the timer to the desired duration, or rotate the dial.
Once the timer is set, initiate the pressing process. The timer will automatically count down, and a buzzer or alarm will sound upon completion. Promptly release the pressure and remove the item from the heat press when the timer signals. Ensure you adhere to the recommended time to avoid under-pressing or over-pressing.
Adjusting Pressure Settings
Proper pressure is critical for effective heat transfer. Too little pressure results in poor adhesion, while excessive pressure can damage materials. Most heat presses have a pressure adjustment knob. Turn it clockwise to increase pressure and counter-clockwise to decrease it. The correct pressure depends on the material thickness and transfer type.
For thinner materials, use light to medium pressure. Thicker items like slate or glass require higher pressure. Test and document settings for different materials to enhance efficiency. Some automatic heat presses may not allow pressure adjustments. Always consult the instructions for specific guidance and avoid over-tightening the pressure knob.
Materials and Compatibility
Understanding material compatibility is crucial for successful heat pressing. Different materials require specific settings. This section covers heat transfer vinyl (HTV) application and sublimation printing, ensuring optimal results for diverse projects.
Heat Transfer Vinyl (HTV) Application
Applying HTV requires precision. Preheat your garment for 5-10 seconds to remove wrinkles and moisture. Place the transfer in the desired location, using parchment paper inside thinner shirts to prevent adhesive bleed-through. Cover with parchment or Teflon. Press with medium/firm pressure for around 20 seconds.
Always follow the specific instructions provided with your chosen HTV. Correct time, temperature, and pressure are crucial for durability. Incorrect settings may result in transfers that fail after washing. Remember to test and document settings for various materials.
Refer to cheat sheets and material reference charts for guidance. Different HTV types, like Siser EasyWeed, may have unique requirements.
Sublimation Printing
Sublimation involves transferring ink onto materials using heat. First, print your design using sublimation ink on sublimation paper. Securely attach the printed design to your item, ensuring direct contact. Preheat your heat press to the temperature recommended for your specific blank.
Press the item for the time specified in the material’s instructions, using medium pressure. Thicker materials may require higher pressure. Carefully remove the item and peel away the sublimation paper.
Always consult the sublimation paper and blank instructions for precise recommendations. Test settings and document them to improve efficiency. Remember that all heat presses are different, so adjustments may be necessary. Avoid damaging your garment by being cautious of heat.

Troubleshooting Common Issues
Encountering problems? This section addresses uneven heat, transfers not sticking, and other common issues. Follow our solutions to ensure your heat press projects turn out perfectly every time.
Uneven Heat Distribution
Uneven heat distribution can ruin heat transfer projects, resulting in some areas being properly pressed while others are not; If you notice this issue, first ensure that the heat press is on a level surface. Check the heating element for any damage or debris that might be blocking heat transfer. A thorough cleaning of the platen can sometimes resolve this issue. If the problem persists, consider using a heat temperature testing strip to identify cold spots accurately.
Also, ensure proper warm-up time; a cold press can take up to 15 minutes to reach the correct temperature, so do not rush the initial heat-up.
Transfer Not Adhering Properly
If your transfer isn’t adhering properly, several factors could be at play. Firstly, double-check your temperature settings. Ensure they match the heat transfer vinyl manufacturer’s recommendations. Insufficient heat is a common culprit. Also, verify that you’re using the correct pressure; too little pressure can prevent proper adhesion.
Preheating the garment for 5-10 seconds helps remove wrinkles and moisture that can interfere with the transfer process. Experiment with slightly longer pressing times. Also, ensure the design is mirrored if it’s supposed to be. Finally, consider the material of your garment; certain fabrics require specific heat transfer vinyl types.

Maintenance and Safety
Proper maintenance and safety are vital for heat press longevity and user protection. Regular cleaning, correct storage, and adherence to safety precautions will ensure optimal performance and prevent accidents.
Cleaning and Storage
To maintain your heat press, regular cleaning is essential. Ensure the press is cool and unplugged before cleaning. Use a soft, damp cloth to wipe down the heating platen, removing any residue from transfers or materials. For stubborn adhesive, use a specialized heat press cleaner. Avoid abrasive cleaners that could damage the surface.
Proper storage is equally important. Store the heat press in a cool, dry place away from direct sunlight and moisture. Cover the platen to protect it from dust and scratches. If possible, store the press in its original packaging or a protective case. This will help prevent damage during storage and transportation, ensuring its longevity. Regular cleaning and careful storage will keep your heat press in optimal condition for years to come.
Safety Precautions
Prioritize safety when operating a heat press. Always ensure the machine is placed on a stable, heat-resistant surface. Never leave the heat press unattended while it is turned on. Keep children and pets away from the operating area to prevent accidental burns or injuries. Wear heat-resistant gloves or protective gear when handling hot items.
Be cautious when opening and closing the press to avoid pinching fingers. Ensure proper ventilation in the workspace to minimize fumes from materials. Regularly inspect the power cord for damage and avoid using extension cords if possible. Always unplug the heat press when not in use or during cleaning. Familiarize yourself with the emergency shut-off procedure. Following these precautions minimizes risks and ensures a safe heat pressing environment.